Video ID: 181001
How to Restring a Hunter Douglas Top Down Bottom Up Cellular Honeycomb Shade
Introduction
Your blinds strings may become damaged, or you may have to change out different components in your top down bottom up shade for multiple reasons. You do not always have to purchase a new shade when the strings break. You can simply follow these directions to restring a Hunter Douglas Top Down Bottom Up Shade to get your shade operating as good as new!
A Note on Safety
Kids can strangle in blind cords. To make your blinds safer for kids, keep cords out of reach and secure cord and bead chain loops. To learn more, please visit our child safety guide.
Tools Needed

Scissors
Phillips Screwdriver
Flat Head Screwdriver
Tape Measure
Rubber Bands
Needle-Nose Pliers
Tape


Step 1 – Remove the shade from the window.


- Loosen the screws on the Hunter Douglas brackets two full turns. Do not remove the screws.
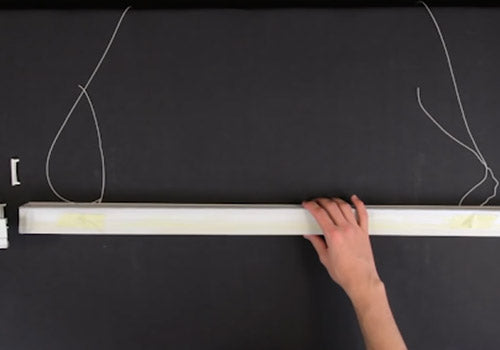
- The shade will come out towards you. Lay it on a flat surface, and compress the shade with rubber bands.
Step 2 – Remove the condensers and tassels, and set them aside.


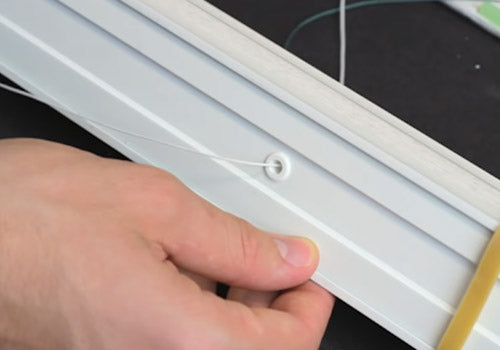
Step 3 – Remove and discard the excess string from the washers, and set them aside.


Step 4 – Remove the cord locks from the top rail.


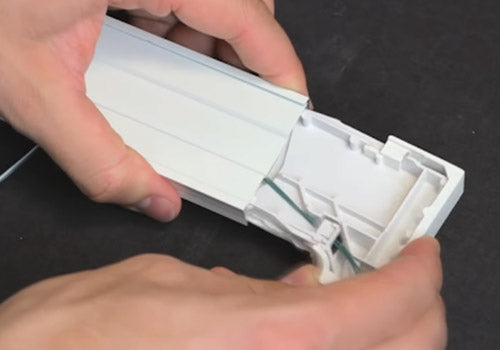
Step 5 – Slide the top part of the top rail off.


Step 6 – Hunter Douglas shades have two different systems of how the strings are routed and attached.

- The new style, on the right, uses the pocket and ferrule system. Begin at step 7 for these instructions.
- The old style, on the left, the strings are tied off inside the rails. Begin at step 22 for these instructions.
Step 7 (For the newer style Hunter Douglas shades) – With the pliers, pull the string out of the pocket until the ferrule comes out of the rail.


- Pull the ferrule off, and set aside for reuse.
- Turn this part of the blind over and repeat for the bottom up strings.
Step 8 – Pull both sets of strings out of each side and discard.


Step 9 – Determine the amount of string you need to cut.


- Measure two times the length, plus the width to get the amount for one lift cord. Your blind has multiple lift cords. This amount will be the same for each lift cord.
- This is a generous estimate. Please remember that it is always better to have more string than less for any blind repair.
- This instructional video uses two different color strings. The green string shows the top down operation of the blind, and the white string shows the bottom up operation of the blind.
Step 10 – Cut all of the strings that you need for this repair now.


Step 11 – Here is a diagram of how the strings are routed through the shade.

- Notice in this diagram that the strings connected to the middle rail go to the right cord lock, and the strings connected to the bottom rail go to the left cord lock.
Step 12 – Using a flat-head screwdriver, remove the end caps from the middle rail.


Step 13 – Slide the middle rail enough to expose the pockets.

Step 14 – Insert a string through the left pocket, and route it up through the adjacent pocket.


Step 15 – Insert the same string up to the tapered side of the ferrule.


Step 16 – Loop the string around and through the ferrule again leaving about a one-inch tail.


Step 17 – Pull the string to seat the ferrule. Push it firmly into the pocket.


- Repeat this process for the other strings that tie off in the middle rail.
Step 18 – Insert the end caps into the middle rail, with the larger legs of the cap on top.


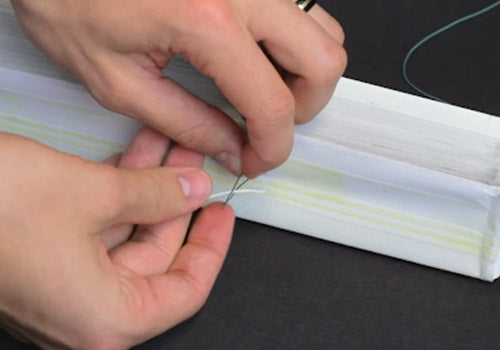
Step 19 – Thread the folded end of the wire restring tool through the shade.


Step 20 – Place the string through the eye of the tool and pull it through.

Step 21 – Thread the ferrule as previously shown, and pull it through to seat it in the pocket.


- Repeat this for the other bottom-up strings.
- Continue to step 37.
Step 22 (For older styler Hunter Douglas shades) - With a flat-head screwdriver, remove the end caps from both the middle and bottom rails.


- Repeat this process for the other strings that tie off in the middle rail.
Step 23 – Turn the shade over, and slide the bottom rail off.

Step 24 – Remove any tape covering the string.

Step 25 – Cut off the washers, and remove and discard any excess string.


Step 26 – Slide the middle rail to expose the equalizer that secures the string.

Step 27 – Using the pliers, separate the two pieces of the equalizer.


Step 28 – Remove and discard the old string.

- Repeat these steps for the other strings tied off in the middle rail.
Step 29 – Thread a string through the cord guide on the middle rail, and tie a knot.


Step 30 – Attach the equalizer.


- Make sure the tapered side is up above the knot when attaching.
- Repeat for all middle rail strings.
Step 31 – Center the middle rail on the fabric, and pull the strings with the equalizer through until seated.


- Complete this step for both sides.
Step 32 – Tie a washer on the end of the bottom up string using a double knot.


- Complete this step for all bottom up strings.
Step 33 – Thread the folded end of the wire restring tool through the shade.


- Complete this step for both sides.
Step 34 – Place the string in the eye of the tool, and pull through until the washer is seated against the fabric.

- Complete this step for both sides.
Step 35 – Cover the washer with a piece of tape.

- Complete this step for both sides.
Step 36 – Slowly slide the bottom rail back onto the fabric.


- Be careful not to snag the fabric.
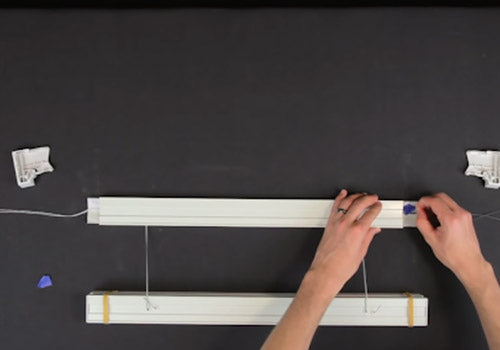
Step 37 – Both the older and newer style shades will finish the same way. Place the sections of your shade on your work surface.

- Keep track of which strings operate the top down function and which operate the bottom up function.
Step 38 – Thread the top down strings through the cord guide on the bottom portion of the top rail.


- Pull the cord to the correct side, and complete this step for the bottom up strings as well.
Step 39 – Examine the strings and make sure that they are going to the correct side, and that they are not crossed, twisted or tangled.


Step 40 – Apply a small piece of tape to hold the strings in place.


Step 41 – Slide the top part of the top rail onto the bottom part of the top rail, and remove the tape.


Step 42 – Replace the end caps on both the middle and bottom rails.


Step 43 – Thread the cord lock.


Step 44 – Thread the strings under the tab first, then down through the lock, and then through the latch.


Step 45 – Slide the cord lock into the railing.
- Make sure not to snag the strings.
- Repeat for the other cord lock.
Step 46 – Compress the shade.

Step 47 – Hang the shade.


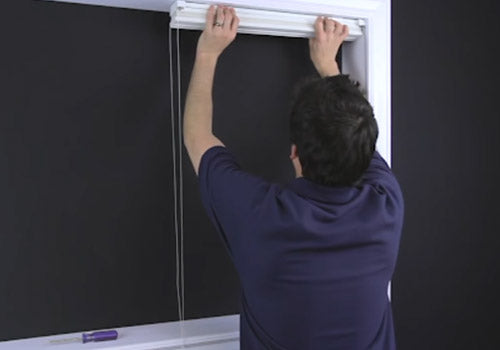
- Slide the top front portion of the headrail onto the bracket first.
- Make sure the front tab of the bracket is seated into the slot at the front of the headrail. Then push the shade back until seated.
Step 48 – Tighten the screws on the brackets to secure the shade.


Step 49 – Test your repair.


- Test the operation of both the bottom up function and the top down function.
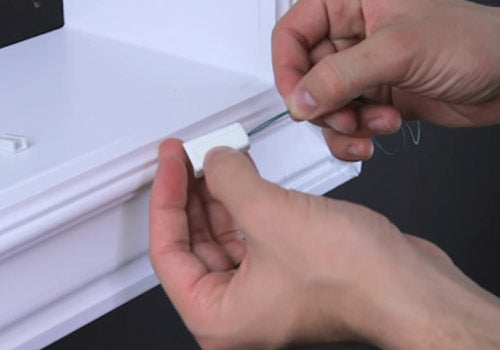
Step 50 – For demonstration purposes, we will illustrate attaching a Duette safety condenser to one side, and a three-part cord stop assembly to the other side.

Step 51 – With the shade all the way up, make a mark approximately two inches below where your shade should stop when lowered.

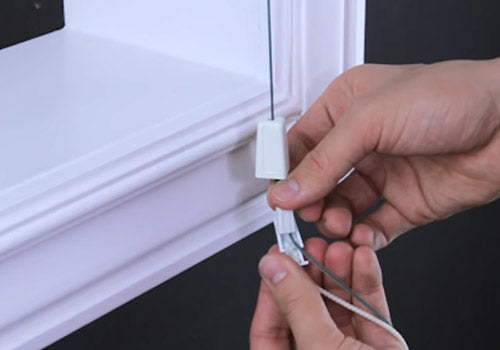
Step 52 – To install a Duette safety condenser, attach one of the strings to each half.


- With the condenser separated, insert a string into the top of one half of the condenser.
- Make sure to tie them off evenly at the mark.
Step 54 – To install the three-part cord stop assembly, first slide the cover onto the lift strings.
Step 55 – Attach the equalizer approximately 2 inches below where your shade should stop when lowered.


- Snap the halves together.
Step 56 – Place the equalizer into the housing.
- Wrap approximately 3 inches of excess string around the bottom of the housing.
Step 57 – Slide the cover down over the housing.


- Trim off any excess string.
Step 58 – Test your repair.


- Test the lifting and lowering functions of both the top-down cords and the bottom-up cords. Make sure the shade locks in place properly.