Video ID: 16004
How to Restring a Vertiglide Vertical Cellular Shade
Introduction
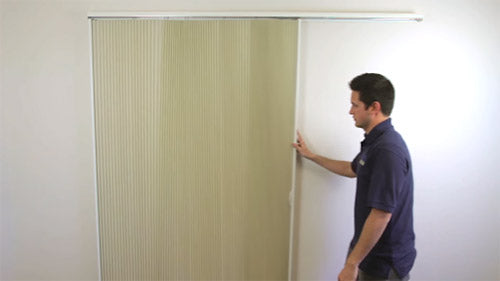
Vertiglide shades are operated using the handle on one side and pushing the shade to the other side. If your Vertiglide honeycomb shade is not operating properly, it is possible that the string inside of the shade is frayed or broken. This guide will walk you through step by step on how to remove and replace the lift string on a Hunter Douglas Vertiglide cellular shade.
This guide covers shades made by Hunter Douglas between September 2004 and May 2015.
Tools Needed

Scissors
Phillips Screwdriver
Tape Measure


Step 1 – Slide the shade all of the way open.

Step 2 – Loosen the cord tensioner on the headrail by sliding it away from the fabric stack.


Step 3 – Remove any fasteners on the stationary bottom bracket on the fabric stack with a screwdriver.


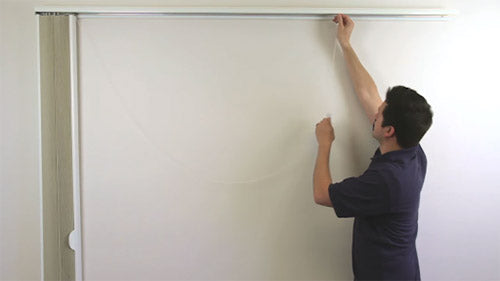
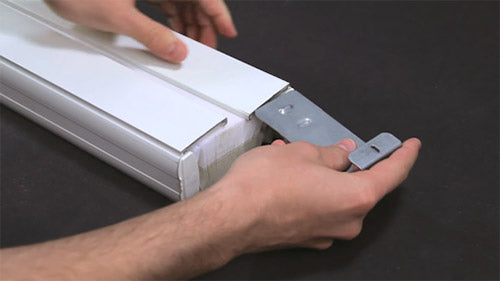
Step 4 – Remove the end plate from the headrail on the side opposite the fabric stack using a Phillips screwdriver.


Step 5 – Slide the cord tensioner all the way over to the fabric stack.


Step 6 – Remove the end plate from the headrail on the side with the fabric stack using a Phillips screwdriver.


Step 7 – Remove the fabric stack from the headrail, and place it on a flat work surface.


Step 8 – Slide the cord tensioner out of the headrail.


Step 9 – With the back of the fabric facing up, remove the snap pins from both ends, and take the assemblies out of the rails.


- A flathead screwdriver can be useful in removing the snap pins.
Step 10 – Remove the end caps on the top with a flathead screwdriver.


Step 11 – Remove the stationary bottom bracket and end caps with a flathead screwdriver.


- A flathead screwdriver can be useful in removing the snap pins.
If the fabric rail carriers on the top of the shade have become loose or have fallen off follow steps 12 through 15. If none are missing or loose, go to step 16.
Step 12 – To remove the fabric rail carriers, carefully fold down the fabric and release the clip.


Step 13 – If necessary, reassemble the fabric rail carrier.


- Slide the top of the fabric carrier clip into the bottom of the rail carrier.
- Attach the rail carrier bearing to the pin end at the top of the rail carrier.
Step 14 – Attach the fabric rail carrier.


- Fabric rail carriers should be attached every 10 cells.
- To attach the carrier, make sure the pin on the carrier clip is seated in the hole in the fabric. Then pinch the clip closed.
Step 15 – Repeat steps 12-14 for each fabric carrier being moved or replaced.
Step 16 – Remove the shade handle with a Phillips screwdriver.


Step 17 – Carefully slide the rails off of the fabric.


Step 18 – Examine the diagram to see how the string is routed through the shade

Step 19 – Determine the amount of string needed. Cut the length of string.

- Measure the length and width of the blind.
- Use the following formula to determine the length of string needed for a side-stack Vertiglide:
- Blind Width + (3 x Blind Height)
- Cut the length of string.
If your Vertiglide is a Center Stack, use this formula to determine how much string you need: Blind Width + (4 x Blind Height)
If your Vertiglide is a Split Stack, use this formula to determine how much string you need: Blind Width + (6 x Blind Height)
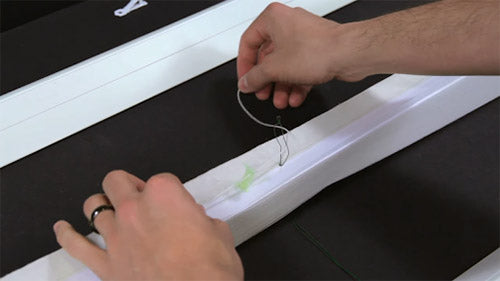
Step 20 – Cut the old string off the spring, and remove the spring.


Step 21 – Remove the remaining old string from the shade and all parts it is connected to.


Step 22 – Create a limiter for the spring.


- The limiter is used to prevent the spring from overextending.
- Cut a length of string 4 times the length of the spring.
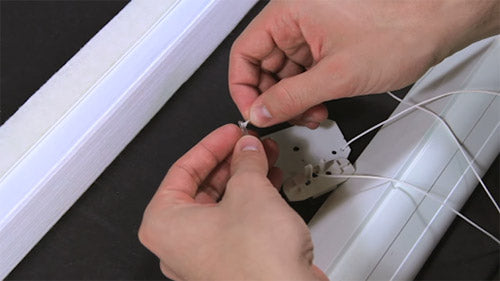
Step 23 – Thread the strings through the ends of the spring and tie a double knot to finish the limiter.


Step 24 – Reattach the spring to the fabric.


Step 25 – Tie the new string to the end of the spring using a double knot.


Step 26 – Thread the string through the cord guide.

Step 27 – Thread the wire restring tool through the fabric.


Step 28 – Thread the string through the eye of the wire tool, and pull them through the fabric.


Step 29 – Thread the string through another cord guide, making sure there is a cord guide on both sides of the fabric.


Step 30 – Thread the string through the end cap with the magnet.


Step 31 – Thread the string through the end plate.


Step 32 – Attach the cord tensioner to the string using a double knot.


Step 33 – Carefully insert the fabric into the rail.


- Make sure the fabric is seated in the grooves shown in the picture below.
- Make sure the green cord guide is lined up properly.
Step 34 – Repeat step 33 for the rail on the other side of the fabric.


Step 35 – Attach the end caps on the top of the fabric and the moving rail roller assembly.


Step 36 – Attach the stationary rail bracket with the snap pins.


Step 37 – Attach the end caps on the bottom of the rails.


Step 38 – Attach the stationary bottom bracket.

Step 39 – Reattach the handle.


Step 40 – Slide the fabric and rail assembly back into the headrail.


Step 41 – Attach the stationary rail bracket.


Step 42 – Screw the end plate on over the stationary rail bracket.


Step 43 – Attach the stationary bottom bracket to the wall.


Step 44 – Slide the cord tensioner into the open end of the headrail.


Step 45 – Screw on the other end plate to the headrail.


Step 46 – Slide the tensioner an inch or two past the point of feeling the spring engage.


Step 47 – Test your repair.


