Video ID: 401029
How to Measure, Install, and Shorten a Horizontal Blind
Introduction
Horizontal blinds purchased from a home improvement store can easily be shortened once installed and are a more cost-effective alternative to custom, professionally installed blinds. Once you have properly measured the window, horizontal blinds can be purchased in a variety of sizes and the width can be cut to order. Typically there are additional slats remaining at the bottom of the blind that should be removed after installation. Removing the slats eliminates unnecessary weight and strain on the blind, and creates a more finished, custom look.
A Note on Safety
Kids can strangle in blind cords. To make your blinds safer for kids, keep cords out of reach and secure cord and bead chain loops. To learn more, please visit our child safety guide.
Tools Needed

Scissors
Flat-head screwdriver
Drill with a drill bit set
Tape measure
Needle nose pliers
Lighter
Pencil
Parts Needed

None
Step 1 – Measure your window.


- Measure the window width in three places.
- Use the smallest measurement and round down to the nearest 1/8 of an inch.
- If you are getting custom made-to-order blinds, you’ll also need to measure the length.
- Measure the window length in three places
- Use the largest measurement and round up to the nearest 1/8 of an inch.
Step 2 – Remove the blinds and hardware from the packaging.


- Carefully cut tape and packaging and open the box to avoid damaging the blind.
Step 3 – Position brackets. Then mark and drill pilot holes.


- Once the brackets are in the desired position, mark the hole location with a pencil.
- Drill pilot holes with a drill bit slightly smaller than the fastener size.
Step 4 – Install the box brackets.


- Position the brackets to line up with the pilot holes.
- Drill the fasteners into the pilot holes to secure the brackets in place.
Step 5 – Position and install the center support bracket.


- If your blind has a center support bracket, position it at the same depth as the box brackets.
- Be sure to position the center bracket where it will not interfere with any of the ladder strings.
Step 6 – Open the latches on each of the box brackets.


Step 7 – Install the valance clips.


- Press the back of the valance clip firmly over the top rail.
- It is possible that some blinds may not have a valance or valance clips.
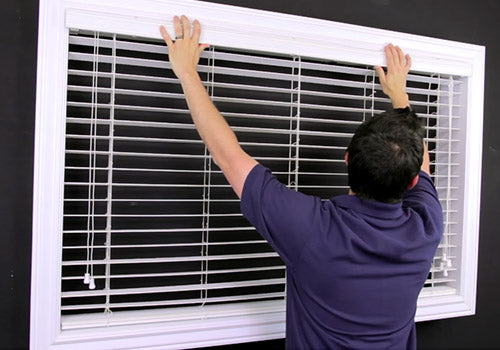
Step 8 – Install the blind.


- Insert the top rail of the blinds into the box brackets and the center support.
- Press the headrail firmly in place, and close the latches on the box brackets.
Step 9 – Lower the blind to the bottom of the window, and test the tilt mechanism.


- Tilt the slats open and closed a few times to make sure it’s working properly.
Step 10 – Lower the blind completely to its full length.


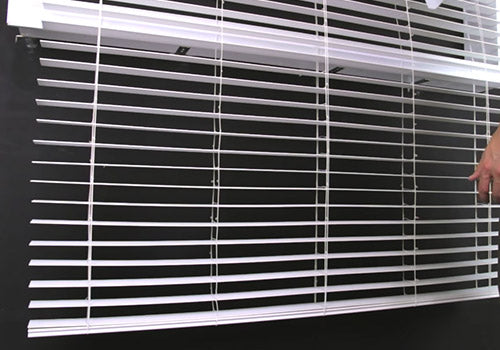
Step 11 – Mark the slat at or just below where the blind should stop.


- The slat that is marked will be the last slat on the blind.
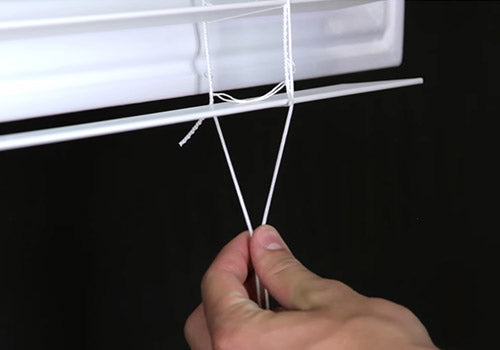
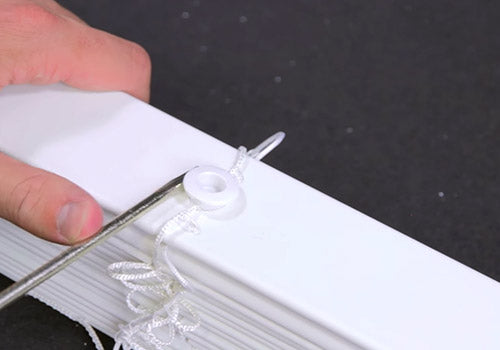
Step 12 – Cut each of the ladder strings six inches below the last slat that you marked.


- Note the difference between the ladder strings and lift strings.
- All of the extra slats will rest below on the bottom rail.
Step 13 – Cut each of the lift strings at the same length as the ladder.

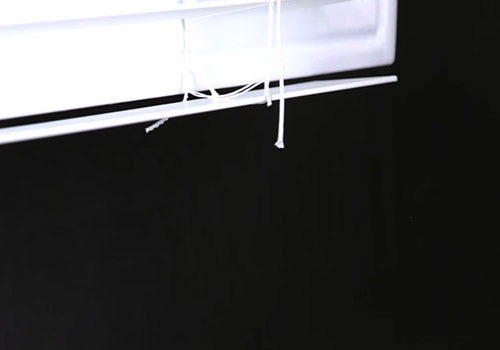
- The lift strings should be cut six inches below the ladder string.
- The lift strings may spring up slightly when cut.
Step 14 – Remove all of the remaining slats hanging below the marked slat.


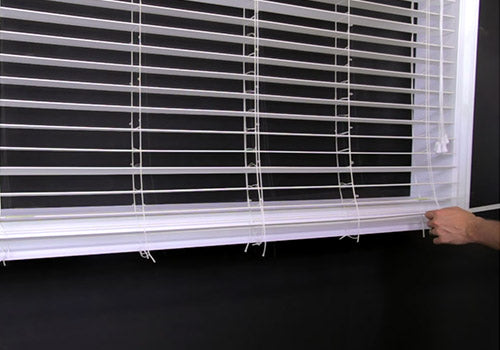
- Keep a few of the extra slats in case you need to replace damaged slats in the future.
Step 15 – Remove the bottom rail buttons and separate the bottom rail from the extra slats.


- Use a flat head screwdriver to remove the bottom rail buttons from the bottom rail.
- Remove excess string and remove the bottom rail from the string ladder.
Step 16 – Use a lighter to slightly melt the ends of the lift string.
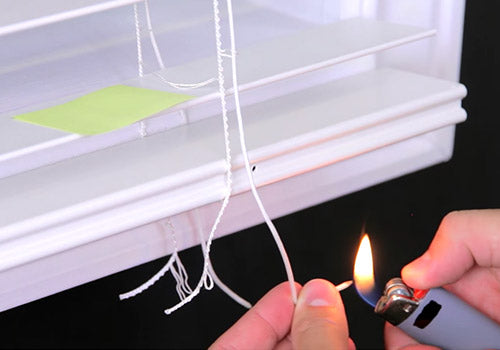


- Melting the ends of each lift string prevents the string from fraying and allows for easier threading.
- It helps to roll the string between your fingers to prevent a large clump of melted string from forming. Be careful not to burn yourself.
Step 17 – Insert the lift strings into the bottom rail.

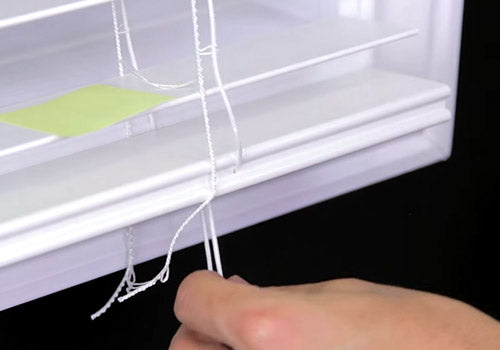

- Insert the melted end of the lift string closest to the window into the small hole on the back side of the rail.
- Pull the string through the large hole on the bottom-most part of the rail.
- Repeat on the front side of the rail with the front lift string.
- Once both strings are inserted, tie the ends of the strings together and tuck the string into the bottom rail.
- Repeat the process with each set of lift strings.
Step 18 – Cut each of the ladder strings two inches below the last slat.


Step 19 – Install the bottom rail buttons.


- Tuck the ends of the ladder string in the large hole on the bottom of the rail.
- Make sure the notches on the bottom rail button are positioned so they line up with the ladder string on each side.
- Firmly press the buttons into the bottom rail to secure the string ladder in place.
Step 20 – Insert the bottom rail end caps, and attach the valance.


- Push the end caps firmly in place on each side of the bottom rail.
- Insert the top of the valance first and rotate the bottom of the valance down and towards the window until it snaps into the bottom of the clips.
Step 21 – Test your installation.


- Lift and lower the blind to test the operation.
- The blind should be hung securely in place and lift and lower evenly.
Recommendations for Child Safety:
- The lifting cords should be no more than 40% the total length of the blind.
- Consider installing safety washers on each lifting cord.
- Leave each cord hanging separately. Do not tie them together.
- Use cleats to keep cords out of the reach of children.