Video ID: 181026
How to Restring a Verosol Pleated Shade
Introduction
If your Verosol pleated shade is not raising and lowering properly, and a lift string is frayed or broken the shade will need to be restrung. This guide will walk you through step by step on how to remove and replace the lift string on a Verosol pleated shade.
A Note on Safety
Kids can strangle in blind cords. To make your blinds safer for kids, keep cords out of reach and secure cord and bead chain loops. To learn more, please visit our child safety guide.
Tools Needed

Flat-head Screwdriver
Scissors


Step 1 – Remove the shade from your window, and lay it on a flat surface.

Step 2 – Remove the end caps from the top and bottom rails.


Step 3 – Slide the bottom rail off.


Step 4 – Remove any cord condensers or equalizers from the string.


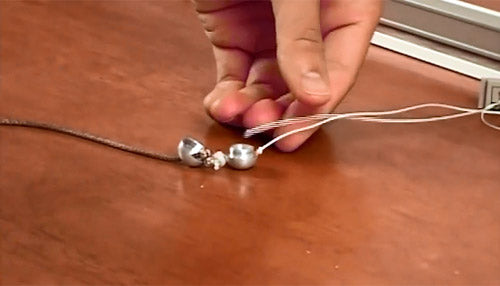
- Save these parts to reuse if they are not damaged.
Step 5 – Insert a small screwdriver into the hole in the top of the headrail to release the cord lock.


- In some models, the cord lock is located on the side of the headrail and can simply be pulled out without having to use a screwdriver.
Step 6 – Slide the top rail off in the opposite direction from the cord lock.


- Note the position of the guide seated behind the cord lock.
Step 7 – Remove all of the old string from the shade.


- Save any plastic washers for reuse.
Step 8 – Determine the length of string needed.

- Measure the length and width of the blind.
- Determine the number of lift strings on the shade.
- Use the following formula to determine the amount of string needed:
[(2 x Length) +Width] x Number of Lift Strings - You will need to replace all of the lift string on the blind to ensure proper operation.
Step 9 – Inspect the cord guides.


- In some cases, the cord may have worn a groove in the guide. If this has happened, replace the cord guide, or rotate the cord guide 90 degrees to create a fresh edge.
Step 10 – Tie a plastic washer to the end of each new lift string using a double knot.

- Make sure the knot is tight and does not slip.
Step 11 – Tie a plastic washer to the end of each new lift string using a double knot.

Step 12 – Insert the needle with the lift string into the route hole on the bottom of the shade.


- Pull the string all the way through until the plastic washer is seated against the bottom of the shade.
Step 13 – Repeat steps 11-12 for each lift string on the shade.
Step 14 – If your shade has a cord lock on the front of the headrail, thread each lift string through the cord lock guide.


Step 15 – Seat the long edge of the cord lock guide in the rear channel on the top of the shade.


Step 16 – Lay the lift strings in the large middle channel so that they are coming out the side of the headrail.


Step 17 – Slide the headrail back onto the shade.


Step 18 – Fish the lift strings through the cord Lock opening with a screwdriver.
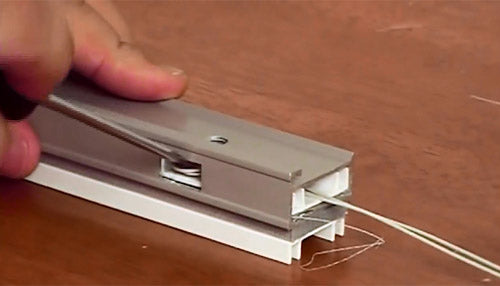


- Pull the string all the way through until the plastic washer is seated against the bottom of the shade.
Step 19 – Lift the locking cam on the cord lock, and insert the strings underneath it.


Step 20 – Insert the rear slide into the slot behind the front guide.


- Move the strings aside until they fall into the slot on the rear side.
Step 21 – Insert the assembled cord lock into the opening in the headrail.


- It will snap into place.
- If your cord lock is on the side of the headrail, slide it into place.
Step 22 – Slide the bottom rail back onto the shade.


Step 23 – Reinstall the end caps onto the headrail and bottom rail.


Step 24 – Rehang the shade.
Step 25 – Lower the shade until it is extended to the desired length.

Step 26 – Trim off extra string leaving at least 6” of extra string.

Step 27 – Insert the lift strings into one end of the condenser.


- Tie a plastic washer onto the end of the lift strings after inserting them through the condenser.
- Do not trim the extra lift string off below the plastic washer until you are sure that the shade raises and lowers evenly.
- Condensers should be installed within 3” of the cord locks when the shade is fully lowered.
Step 28 – Trim the lift string below the plastic washer leaving about a ½”.

Step 29 – Attach the other half of the condenser.

